Creating life castings of your baby can be a deeply meaningful and rewarding activity for several reasons:
Preserving Memories: Babyhood is fleeting, and children grow up quickly. Life castings capture the tiny details of a baby's hands, feet, or even their little bottom in a moment of time, preserving those precious early memories in a tangible form.
Unique Keepsakes: Unlike photographs or videos, life castings offer a three-dimensional keepsake that can be touched and felt, adding a physical dimension to your memories. They can be displayed in your home, becoming a permanent and cherished artifact of your child's earliest years.
Personalized Gifts: Life castings make heartfelt gifts for family members, especially grandparents, who may cherish these physical reminders of their grandchild's early days. They can be more personal and unique than typical store-bought gifts.
Emotional Connection: The process of creating life castings can be a bonding experience. It involves close interaction with your baby and can be a loving and gentle activity that enhances your emotional connection.
Artistic Expression: For many, the act of creating a life casting is a form of artistic expression. It allows parents to engage in a creative process that results in a beautiful piece of art that is also deeply personal.
Celebration of Growth: As your child grows, comparing their current size to the life casting can be a joyful way to celebrate their growth and development. It serves as a reminder of how small they once were and how far they have come.
In essence, life castings are not just about creating a mold; they are about capturing moments of joy, growth, and the deep emotional bonds of family in a form that lasts a lifetime.
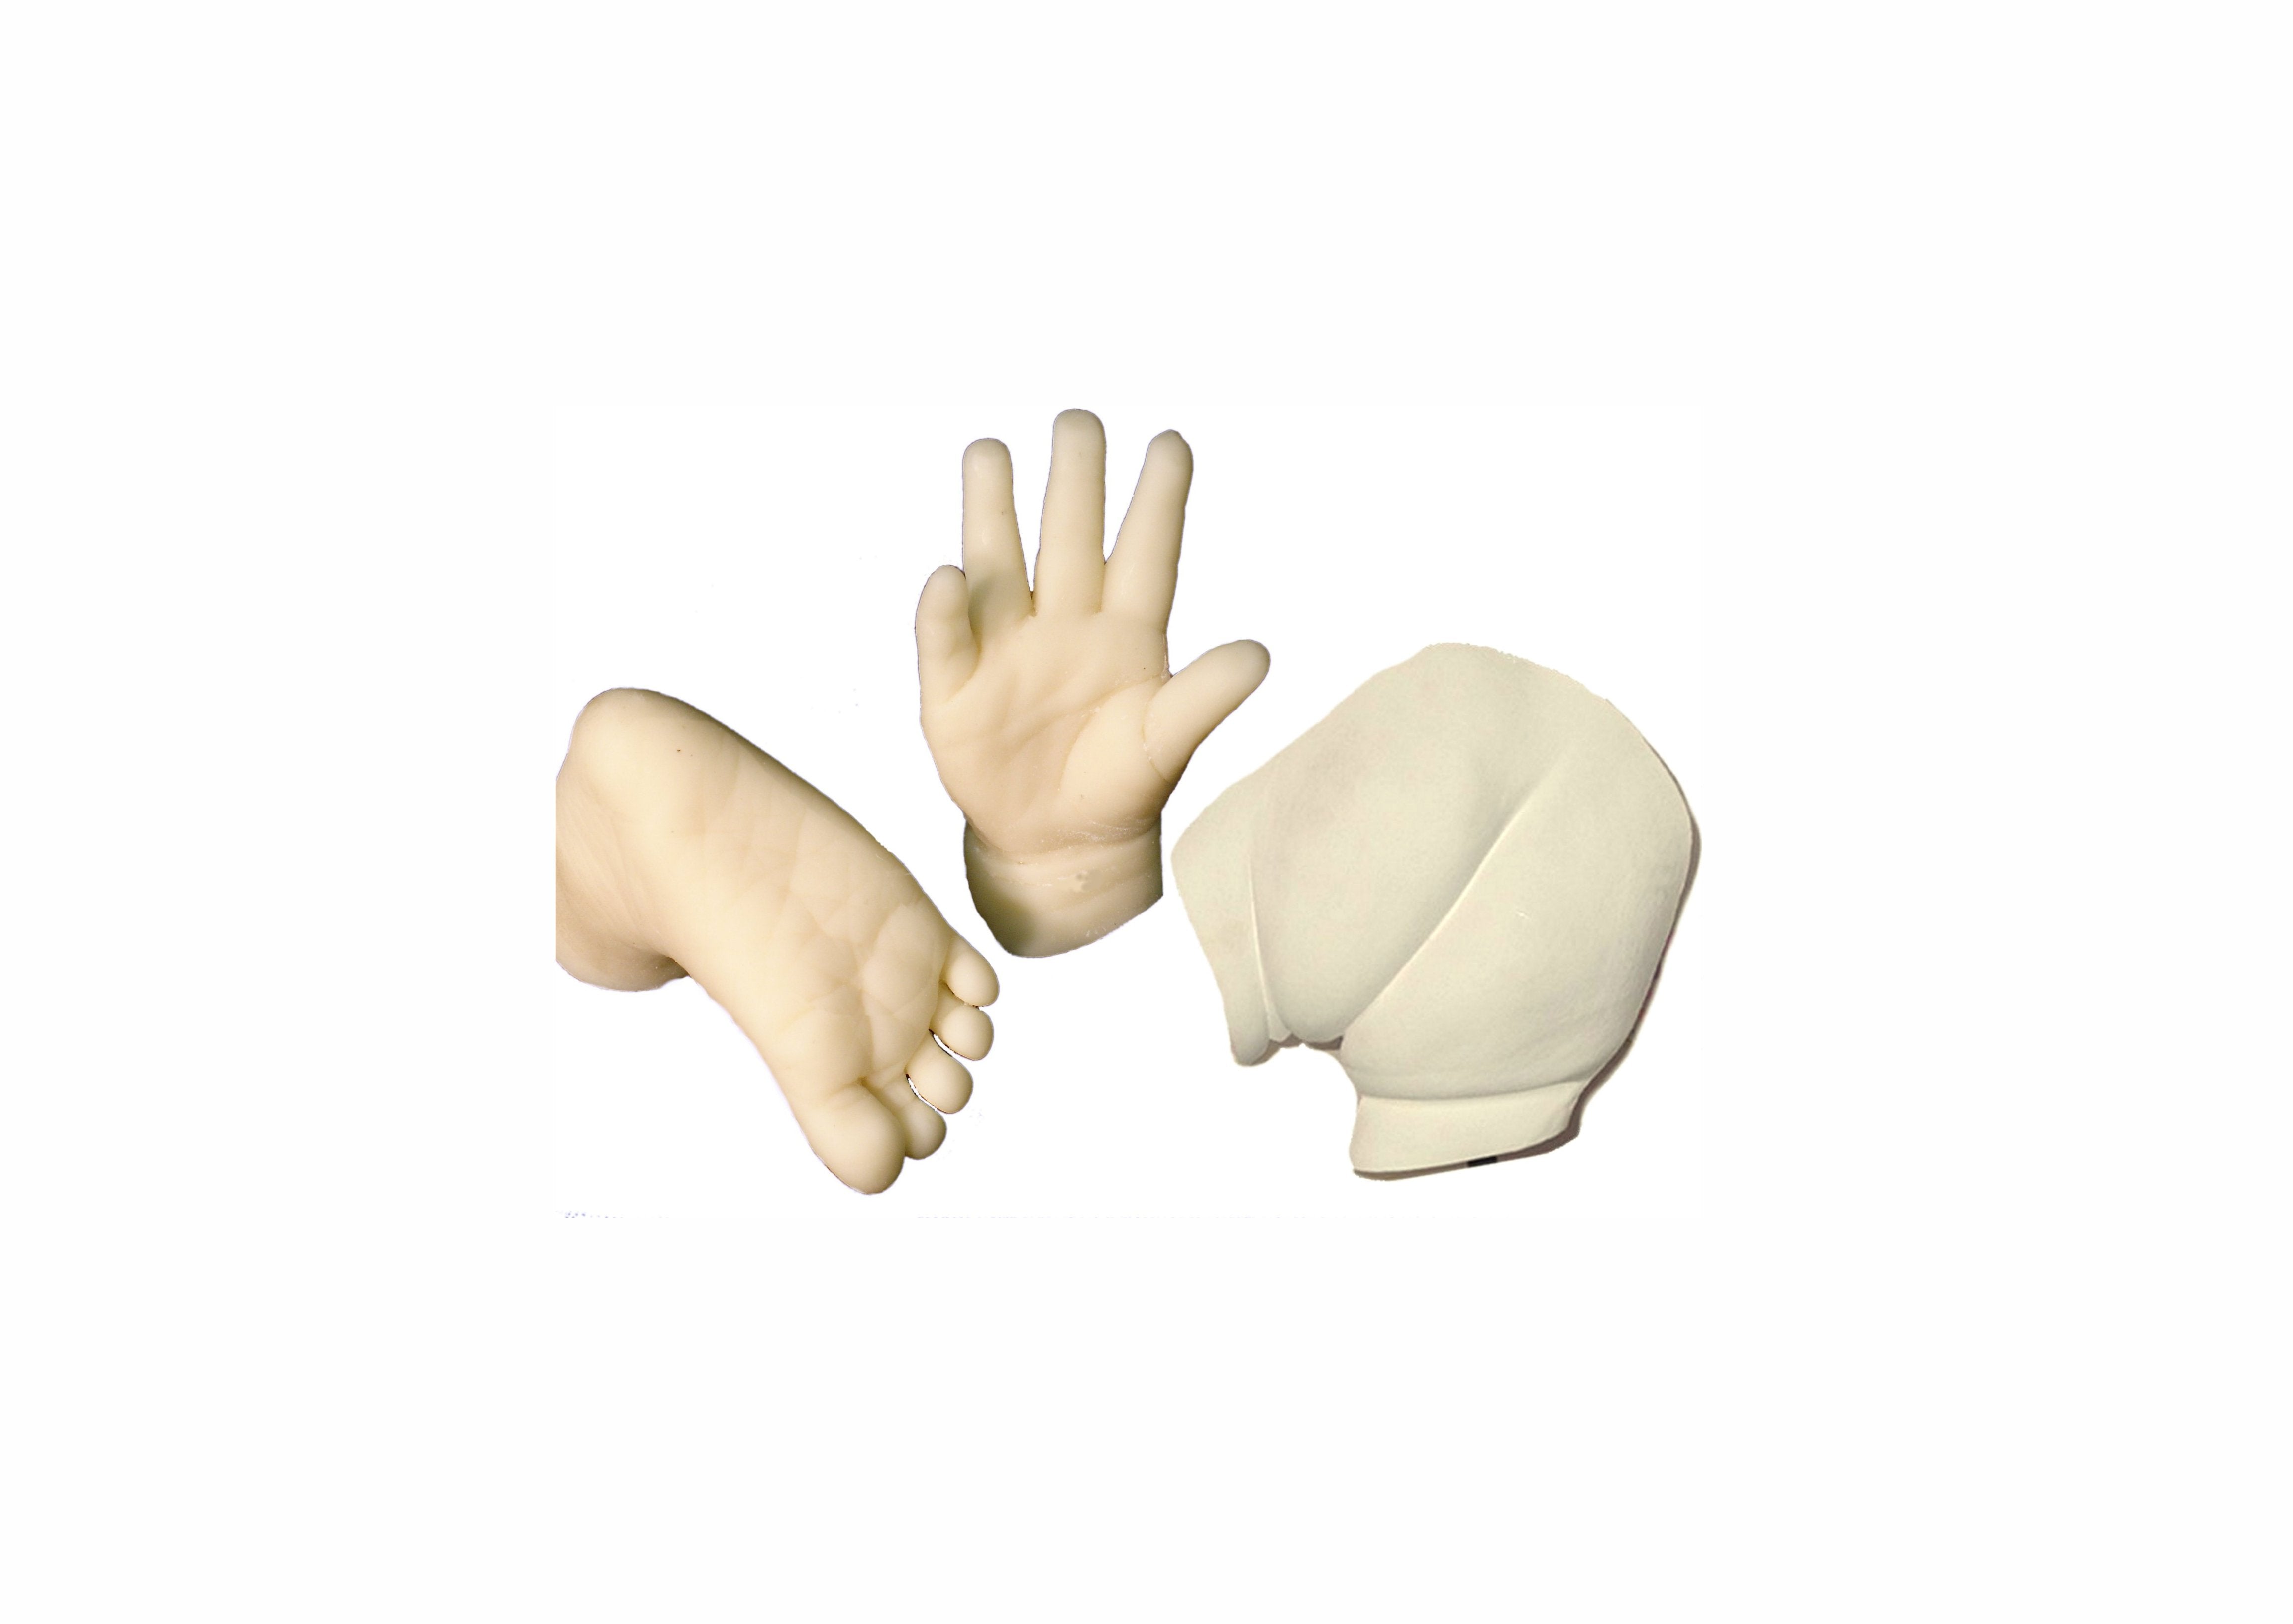
In addition, casting a baby's hand, feet or bottoms is perhaps the first interest of the beginning life casting enthusiast. Creating these tiny molds doesn't require any experience and are often perfected on the first try. So, they are a good place to start for anyone interested in life casting. The material requirements are both minimal and inexpensive. The only valuable item in the process is of course, the baby itself.
But the materials involved are extremely safe to use on baby's delicate skin as they are hypoallergenic, having been made from such organic compounds as seaweed. Similar material to those used for those expensive spa facials. Many agree that one of the most precious forms of life casting art one can create is casting babies and young children. They are emotionally powerful presents for grandparents as well as great keepsakes for friends and family.
Over the years I have never tired of the reactions that this tiny casting produces, from expressions of jaw dropping joy to copious tears. Yet not everyone appreciates these cute memorials. Years ago, I had the bright idea of taking a cast of a baby’s hand, posed in a tiny fist, and then creating a series of silicone mold copies so that I could produce a number of duplicate castings of the little hand. Over a period of several days, I cast 500 babies’ hands in polyurethane resin – a plastic.
I then printed our company name and address on them so I could pass them out at the National Art Materials’ trade show as a souvenir. Though they were mostly very well received by the visitors to our booth, about ten percent of those that were offered the souvenirs ran from them – it gave them shivers. At first it surprised me. Then I realized that not everyone thinks of a detached baby’s hand as cute. Some think it is macabre. So, let’s hope that your client or grandparent doesn’t think that way, too.

Figure 1. Have all your materials gathered, measured and ready in advance.
Materials for Baby Hand Casting
(1) 16-oz. Dixie cup
Measuring cup
2- Mixing bowls or containers
Wire kitchen whisk
Box cutter or XActo knife
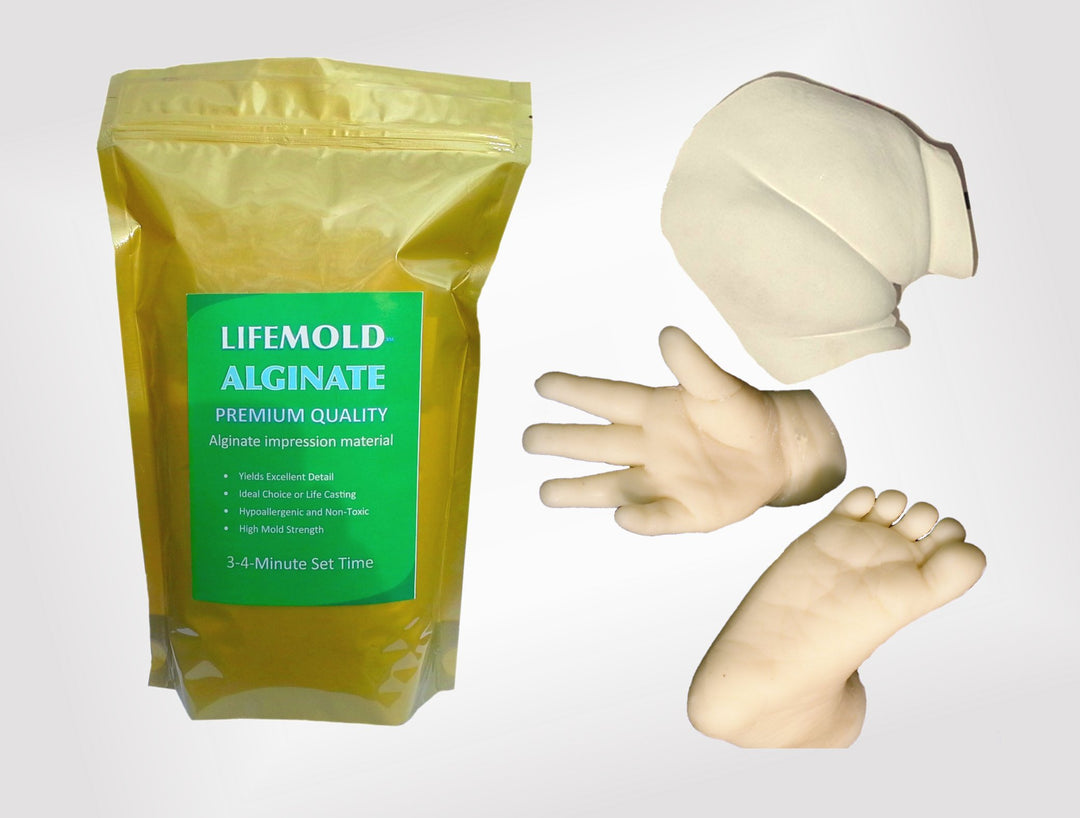
½ lb. Hollywood Impression SIFREE alginate (Fast Setting)
Distilled water
1 –lb. of CastRite or casting plaster
The materials to cast a newborn child's hand are extremely safe to use on even a newborn. We formulated our Hollywood Impressions alginate to be environmentally friendly, hypoallergenic, and of course skin safe. This material is basically made from seaweed and pulverized paper. To make a mold of a youngster, you need a very fast setting alginate, as you probably know, babies and toddlers can’t stay still and wait for your mold material to set.
So, if you use 80°-90°F. (26.6° to 32.2° C), water with Hollywood Impressions alginate, you will have a set time of a little less than two minutes. That is still too long, but with mixing and readying the alginate, you’ll cut off another 45-60 seconds, leaving a window of a minute – but again that may be a bit too long to have your tiny subject to wait. We advise waiting thirty seconds after you finish mixing before using it on the subject.
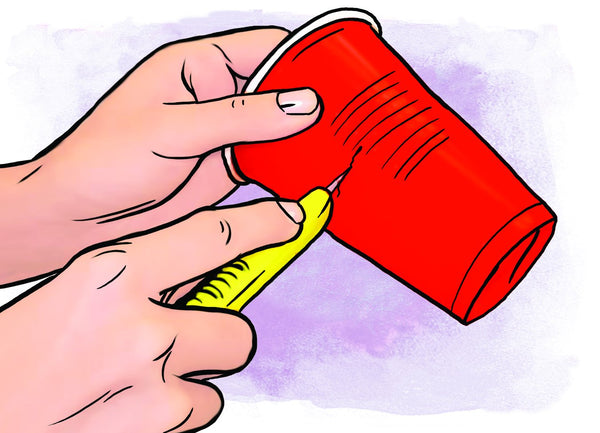
Figure 2. Cut your molding container so it is sized correctly for the subject you will be casting.
With that bit of a preamble under our belt, we begin the mold making process by first preparing a mold making container. We normally use a 16 oz. Dixie cup which we cut about halfway to two-thirds up from the bottom using a box cutter or an X-Acto knife.
This makes the cup shallow enough to create a mold of the baby's hand, plus also capture some of the arm above the wrist. Of course, the mold cup depth will vary based on the size of your subject’s hand and arm. You can quickly determine the depth by placing the baby’s hand into the empty cup, making certain it doesn’t touch the bottom and then marking the spot on the side of the cup where you will cut.
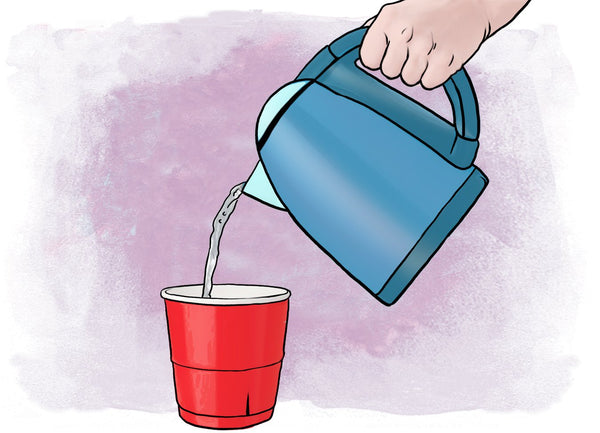
Figure 3. Water is warmed to about 90o F (32o C) and poured into the molding container to the top. Water should be ‘soft’ preferably distilled or alginate will have a lumpy mix.
With the mold container prepared, fill it with 80°-90°F. (26.6° to 32.2° C), to the top of the cup. That is the amount of water you will need to mix with the molding powder. To determine the amount of molding powder you will need, pour the water into a measuring cup.

Figure 4. Pour the water back into a measuring cup so you can determine the exact amount of water needed.
The mix ratio is 7 parts water to 1 part powder by weight. If you show 7-oz. of water, you should weigh out 1-oz. of Hollywood Impression. Using a separate container such as a kitchen bowl, add your water first and then your powder second.
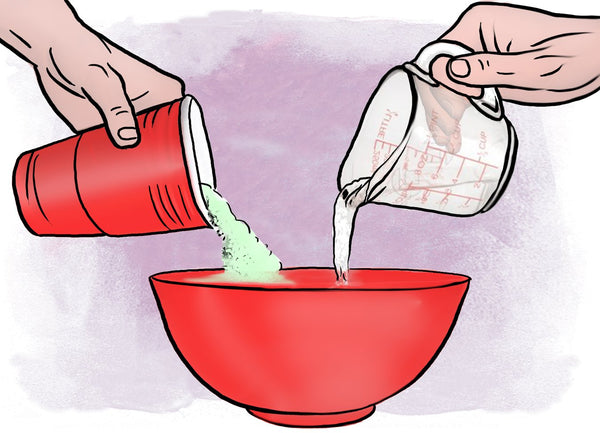
Figure 5. The mix ratio is 7 parts water to 1 part Hollywood Impressions SILFREE alginate. First add water to a mixing bowl, then add the correct amount of alginate.

Figure 6. Mix well using a wire kitchen whisk. This mixer-type reduces the amount of air incorporated into the alginate during the mixing process. You don’t want air bubbles.

Figure 7. Carefully pour the mixed alginate back into the molding container.
Use a wire kitchen whisk to stir until creamy smooth and transfer the mix back into the mold container.
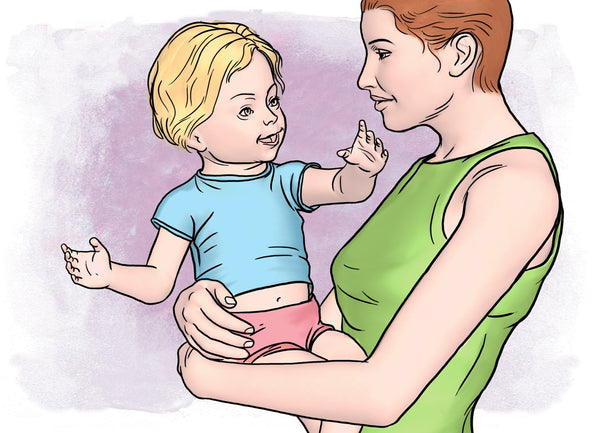
Figure 8. Have mom hold her baby in her arms. This not only comforts your subjects, but helps to reduce unwanted wriggling.
If it is a young baby, have the mother hold her in her arms. Gently take the baby’s forearm in your hand and guide the hand into the cup of alginate. Lower it in until you feel it touch the bottom. Then drop the cup slightly so that the baby’s hand does not touch the bottom.

Figure 9. Both mom and the life casting hold the baby’s forearm to steady it. While the life caster holds the molding container with the baby’s hand inside it.
Distraction in Action. Now the tricky part.
The part that separates the good life casing artist from the not as good. Half the time the act of placing a baby’s hand in a new goopy media result in a wriggly hand at the very least and a crying baby at the most. So, the secret to capturing a good casting is the combination of timing and simple distraction. Short of waiting until the baby is asleep, you have two simultaneous acts to pull off to achieve a good casting.
The first action is timing. That is, as described above, waiting about 30-45 seconds after mixing and transferring the alginate into the mold container so the baby’s hand in the container is delayed, and only in the container about 30-45 seconds before the alginate sets.
The second is distraction. Believe me, I have experimented with numerous distractions with marginal results until the late Dave Parvin suggested that I use a motion of moving the cup up and down while the baby’s hand was in it.

Figure 10. The life caster moves the molding container up and down the baby’s hand to reduce the baby’s desire to move it.
The up and down motion seemed to work in most cases, distracting the baby momentarily as to what was going on with his hand, while the alginate was curing. As you move the cup you can feel the resistance created by the alginate as it cures. So that when it becomes more difficult to move up and down, hold it still for ten-fifteen seconds to allow the alginate to snap set. This method works in most cases, but of course is not foolproof. Sometimes you will have finished a baby casting session sans baby casting.
Remember, life casting is an art form and not science – sometimes art flops. If that is the case, you’ll just have to postpone the session for another day, perhaps when it is nap time.
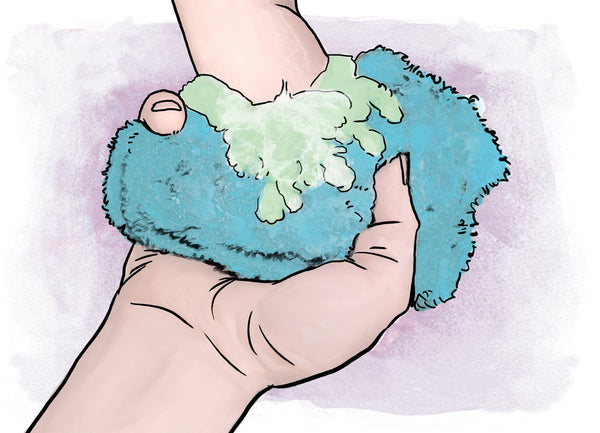
Figure 11. A less desirable method (but works well), for creating a baby's hand mold is using a washcloth filled with alginate held firmly around the baby's hand. This method is used on baby's whose hand won’t stay still long enough for the normal mold container method.
Mold of Last Resort
Yes, there is a last resort that will save the day and your reputation as a professional studio life casting artist, but it requires that you sacrifice a terry cloth wash cloth.
The Terry Cloth Method
Lay the washcloth on a flat surface and add a scoop alginate in the center dispersing it out and about so you have about a 6-inch circle of alginate which is about an inch, to an inch and one half thick.
Ask mom to hold her baby’s forearm to steady it and then using both your hands, carefully wrap the terry cloth around baby’s hand – alginate side in – so that you it have completely encased the baby’s hand and wrist with the alginate. Keep your hand gently, but firmly clutched around the baby’s hand, allowing it to move as the baby’s hand moves.
Once the alginate sets, carefully open the terry cloth slightly and pull the alginate mold off the baby’s hand. You should have succeeded in obtaining a very good hand casting mold following this novel procedure.
Pouring the Casting.
Due to the size of the mold, you will not need much material to create a casting. The mix ratio for CastRite is 10 parts CastRite to 7 parts water by weight. The best way to calculate this is to fill your newly made mold with water. Then pour it out into a measuring cup. Since a pound of water conveniently equals sixteen ounces, then if the measuring cup reads 8 oz., that means your water requirement is also 8-oz. The formula is 10/7 + x/8=0 if you remember your algebra.
But if you don’t like to solve for X, there is a simpler way. Pour the water into a cup or container and then spoon out a little CastRite and mix it with the water. Continue adding CastRite until you have a mixture the consistency of a thick heavy cream or a thin yogurt. That is all there is to it.

Figure13. CastRite powder is measured out in the clear container and water is contained in the measuring cup. The ratio of casting powder is 10 parts powder to 7 parts water. An empty cup and a mixing stick are ready to do their job.
Carefully pour it into your mold and fill to the top. Tap the mold on its sides for about a minute to help drive air bubbles to the top of the fill hole. Then leave your mold undisturbed for three hours.
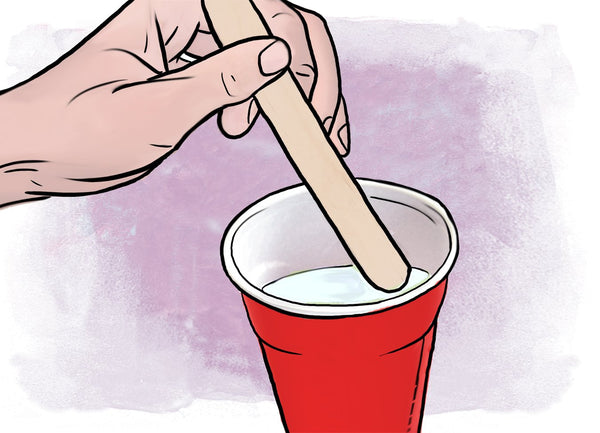
Figure 14. The casting powder and water are combined and mixed so that the mixture is lump-free.
De-Molding.
After three hours, check the surface of the casting material to make certain it has solidified. If so, it is time to de-mold. If not, let it continue to be left undisturbed until it does set.
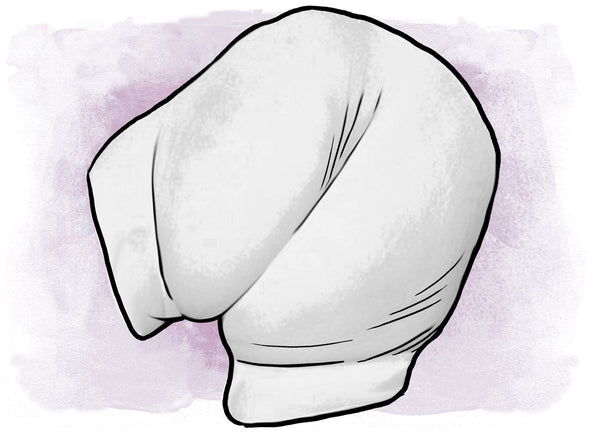
Slip the alginate out of the cup or container it is in. It might be necessary to slice the side of the cup to release the mold block of alginate so that it can be removed. Once you have removed it, carefully slice down about two thirds of the way on each side of the mold. Be very careful you do not touch the casting inside as it is still soft enough to be damaged.
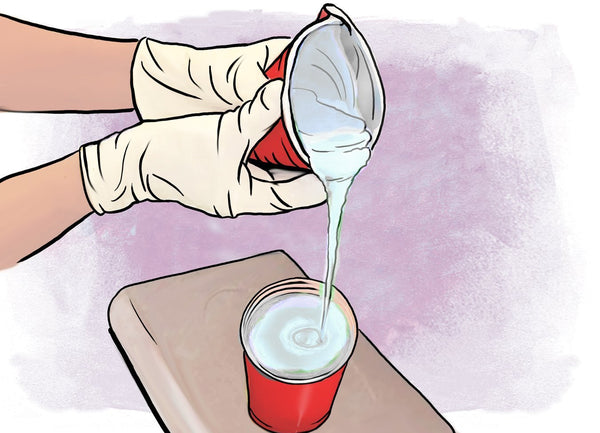
Figure 15. When the casting mixture is smooth, it is poured into the mold to the top and left undisturbed for three hours.
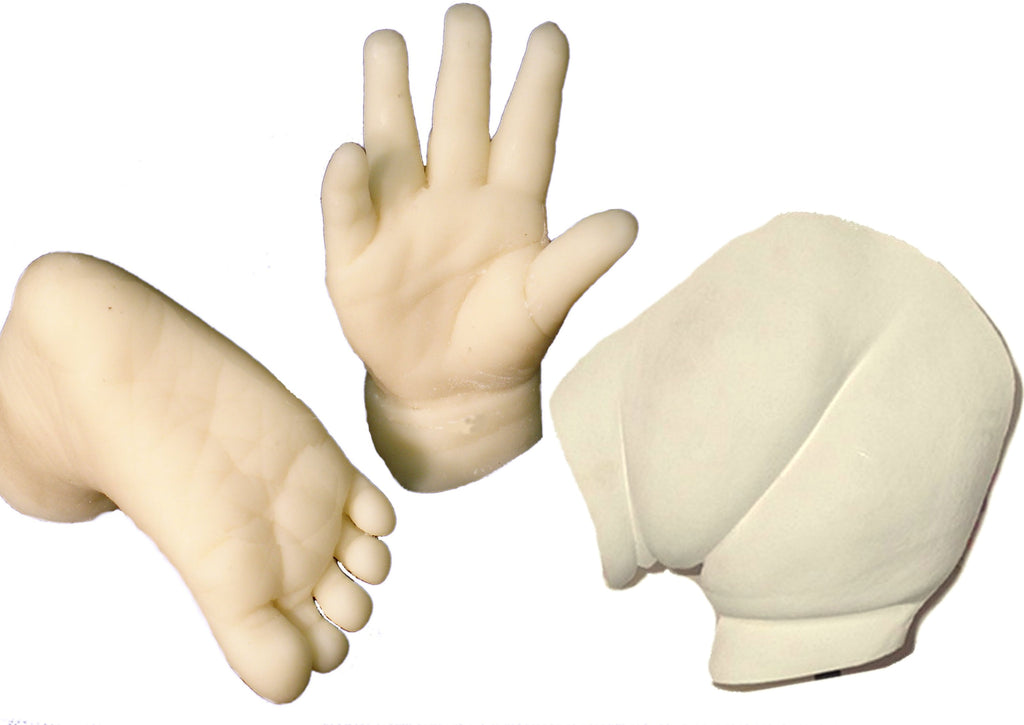
Spread open the alginate mold and carefully pull out the casting. Check it for flaws, there are bound to be a few. You can clean them up with your box cutter. You can also fill in any depression with a little Spackle wall repair compound.
If you are making a presentation or completing a paid commission, wait forty-eight hours and then seal your casting with a clear polyurethane matte sealer. Krylon® and Rustoleum® are good brands to consider.
As a picture without a frame, your casting is not complete without some sort of display mounting such as wood or marble base. You can attach the casting to either using two-part epoxy found at the local hardware store.
Finally, a personalized brass name plate affixed to the base on which you mounted your casting will provide that special gallery touch to your artistic works.

Figure 16. The alginate mold is slipped out of its molding container and sliced part way down its two sides so that the new cast be be slipped out of it.
Casting a Baby’s Foot.
The casting of a baby’s or toddler’s foot follows the identical procedure used for hand casting. The inference, of course, is the extremity. Instead of a round mold container you need to use a shallow rectangular container. This can easily be obtained by using a deli container or a small plastic food storage container. You will need a little more alginate to fill the container as it is usually a little larger than the half cup used for the hand. After the alginate is set, extracting the foot may require you to use a plastic knife to separate the alginate in the back of the heel so the foot can more easily slip out. But that is really the only difference. Casting the foot mold is identical to casting a hand mold.

Figure 17. The baby’s hand is inspected, and once it is cleaned up, it is ready to mount on a presentation plaque.
Casting a Baby’s Bottom
For casting a baby’s bottom you will need a shallow bowl and about one pound of fast setting alginate such as LifeMold. Mix the alginate with warm water that isn’t hard (distilled water is always preferred) and fill the bowl. Have the mom place the baby into the bowl while the alginate cures. This should take no more than three minutes or so. Then lift the baby straight out. You may need a little help for this as the alginate will create suction against the skin. So, take your fingers and gently separate the alginate from where it is sticking to the skin to break the suction.
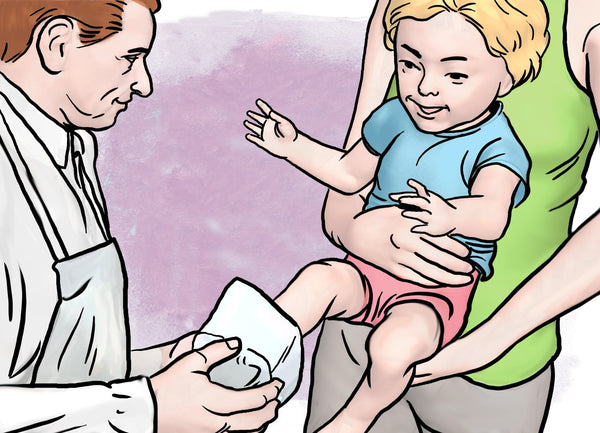
Figure 18. A foot casting is being taken using a small plastic container as the mold container.
Inspect the mold as it has the tendency to contain loose bits of alginate at this stage. So, hold the alginate and the bowl together so that alginate mold doesn’t drop out and flip it upside down to clear out ant debris. The mold is ready to cast at this stage. Mix casting plaster and water. The mix ratio for CastRite is 10 parts CastRite to 7 parts water by weight.
Fill the mold to the top and wait three hours before de-molding.
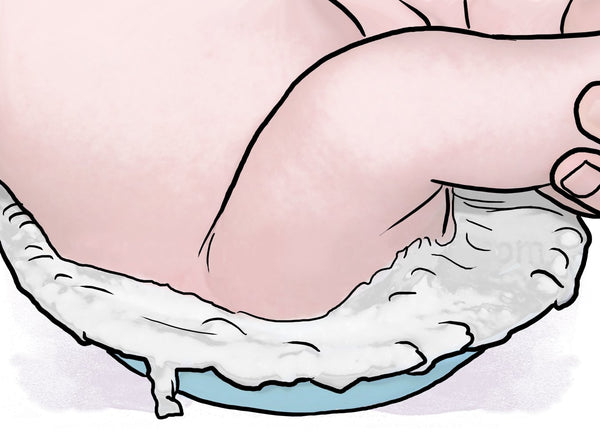
Figure 19. To create a casting of a baby’s bottom, the baby is placed in a shallow bowl filled with alginate.
When the casting medium has been set, carefully flip the bowl, alginate mold and casting medium upside down to free the mold from the casting bowl. Lift off the alginate to reveal the newly cast baby’s bottom. Once the casting is cleaned up of flashing and small holds filled with Spackle set it aside to dry for forty-eight hours. Then seal with a matte clear polyurethane. Happy Mold Making!
Leave a comment