Baby Casting | Page 1 - ArtMolds
- Life Casting Forward
- Life Casting Explained
- Introduction to Life Casting
- Basic Life Casting Technique
- How-to Videos
- Life Casting David Blaine
- Life Casting Iman
- Life Casting Hall of Fame
- Life Casting Materials
- Life Casting Kits
- Life Casting on TV
- Baby and Child Casting
- Hand Casting Examples
- Hand Casting Instructions
- Casting Ring of Hands
- Face Casting Examples
- Face Casting Instructions
- Ear Casting Instructions
- Portrait Casting
- Torso Casting Nude Figure
- Full Body Casting
- Life Casting Books
|
|||||
|
Many agree that one of the most precious forms of life casting art one can create, are castings of babies and young children. They are emotionally powerful presents for grandparents as well as great keepsakes for friends and family. Over the years I nave never tired of the reactions that this tiny casting produces, from expressions of jaw dropping joy to copious tears. Yet not everyone appreciates these cute memorials. Years ago, I had the bright idea of taking a casting of a baby’s hand, posed in a tiny fist and then creating a series of silicone mold copies so that I could produce a number of duplicate castings of the little hand. Over a period of several days I cast 500 babies’ hands in polyurethane resin – a plastic. I then printed our company name and address on them so I could pass them out at the National Art Materials’ trade show as a souvenir. Though they were mostly very well received by the visitors to our booth, about ten percent of those that were offered the souvenirs actually ran from them – it gave them shivers. At first it surprised me. Then I realized that not everyone thinks of a detached baby’s hand as cute. Some think it is macabre. So let’s hope that your client or grandparent doesn’t think that way, too. |
|||||
|
|||||
|
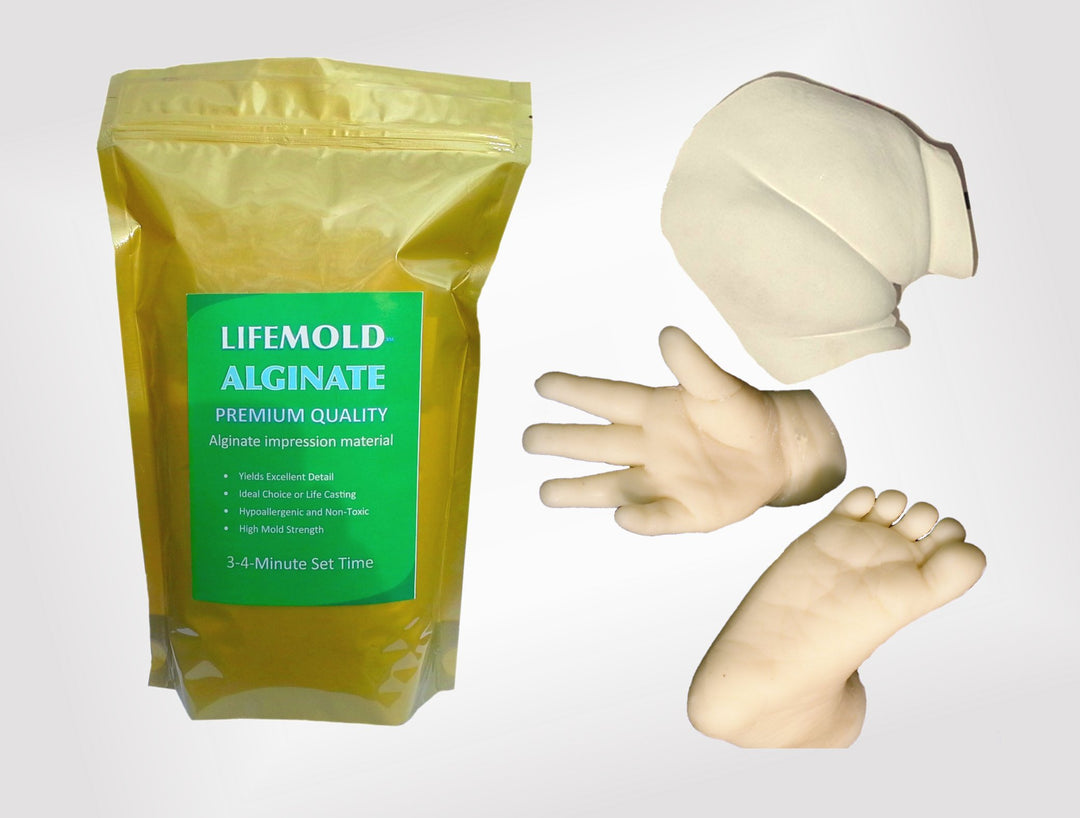
Preparation: The materials to cast a new born of child's hand are extremely safe to use on even a newborn. We formulated our Hollywood Impressions alginate to be environmentally friendly, hypoallergenic and of course skin-safe. This material is basically made from seaweed and pulverized paper. To make a mold of a youngster, you need a very fast setting alginate, as you probably know, babies and toddlers can’t stay still and wait for your mold material to set. So if you use 80o-90 o F., water with Hollywood Impressions alginate, you will have a set time of a little less than two minutes. That is still too long, but with mixing and readying the alginate, you’ll cut off another 45-60 seconds, leaving a window of a minute – but, again that may be a bit too long to have your tiny subject to wait. So we advise waiting thirty seconds after you finish mixing before using it on the subject. With that bit of a preamble under our belt, we begin the mold making process by first preparing a mold making container. We normally use a 16 Oz Dixie cup which we cut about halfway to two-thirds up from the bottom using a box cutter or an X-Acto knife. This makes the cup shallow enough to create a mold of the baby's hand, plus also capture some of the arm above the wrist. Of course the mold cup depth will vary based on the size of your subject’s hand and arm. You can quickly determine the depth by placing the baby’s hand into the empty cup, making certain it doesn’t touch the bottom and then marking the spot on the side of the cup where you will cut.
|
Figure 3. A 16-OZ cup is made more shallow to accept the babies hand to a little bit over the wrist. |
||||
|
With the mold container prepared, fill it with 80 o--90o F water (26.6 o--32.2o C) to the top of the cup. That is the amount of water you will need to mix with the molding powder. |
Figure 4 Warm water (distilled) is poured into the container to the top. |
||||
| Page 1 | 2 | 3| 4 | |||||